
Planning the van


One of the best things about camper vans is how compact they are. You basically get a mini-house, plus the mechanical means to drive it around from place to place, all packed into a neat little cuboid that still fits into a normal-sized parking space. This is also one of the worst things about camper vans. There’s a lot of stuff to be squeezed into a very limited footprint, so figuring out exactly what bits and pieces are going to go in there and how it’s all going to fit together is a crucial early step in the van building journey.
Making a wishlist
To get a handle on this, I started by considering our use cases: what are we going to use the van for? Our number one use, at least for the near future, is taking the family (two adults, two kids) out into the wilds for long weekends to go climbing, hiking and mountain biking. We also want to be able to do one or two longer trips a year during the summer, for anywhere from a week up to about a month. Mostly, we’ll be overnighting in either dispersed camping spots in the woods or the desert, or at US Forest Service campgrounds (which typically don’t have electricity, and often don’t have water). We’ll often get to a place and stay there for a few nights while we explore the neighborhood, so we don’t expect to drive every day. Longer term, once the kids are no longer traveling with us, we like the idea of doing some much longer trips (multiple months), but all that is a ways off. One thing we’re not planning on doing though, is living in the van full time, especially over winter. #notreadyforvanlife!
The next thing to think about is the level of comfort and convenience to aim for. At one end of the spectrum, you can look at the camper van as just a large metal mobile tent. All you need is a place for a mattress and somewhere to stash all your camping gear. You expect to be cooking and eating outside, and you scoff at the notion of vans with indoor toilets or showers or plumbed hot water or any other such nonsense! At the other end of the spectrum, you have the gorgeous tiny houses on wheels that you see all over YouTube. Packing in full kitchens and bathrooms, with beautiful cabinetry, illuminated by soft indirect lighting, these vans have every convenience that you would find in your home, slimmed down and ingeniously fitted into the limited space.
I fall somewhere in the middle but more towards the latter than the former! I enjoy many of the comforts of home, and a camper van is a great opportunity to take some of those comforts out on the road and into the wilds. There are limits of course, but half the fun is seeing how far you can push them…
With all that in mind, the next step was to come up with a list of requirements. First, there are the “must haves”:
Safe passenger seating for two teen-aged kids, in addition to two adults in the cab.
A comfortable bed for Amy and me.
Sleeping space for the kids, though the expectation is that they will be turfed out to sleep in a tent whenever convenient. It’s better for everyone...
An indoor toilet in a private space. We’re often going to be far from any public infrastructure, and I want to be able to do my business like a civilized person!
A kitchen with enough space and stovetop capacity to prepare and cook meals for four inside. Cooking outside is great, but the weather doesn’t always cooperate.
A kitchen sink with running hot and cold water and a gray water tank, for washing dishes.
Table and seating big enough for four people to sit and eat a meal at, or play board games at.
A shower for rinsing off after mountain biking (could be outside in a pinch).
Enough storage for gear, food, kitchen stuff, clothes, etc.
Carrying capacity for at least four mountain bikes (doesn’t need to be inside).
A heating system and adequate insulation to allow the van to be used in the spring or fall in the mountains.
Sufficient off-grid reserves of electricity and water to allow us to function without needing to drive anywhere for 3-4 days at a time.
On top of that long list we can add a few “nice to haves”:
A shaded awning area where we can sit outside without getting frazzled by the sun / drenched by the rain.
A bed arrangement that minimizes daily set up / take down.
No propane. We don’t like the idea of burning it inside the van for cooking, and it’s an additional fuel we’d rather not have to deal with.
A separate small sink in the bathroom for washing hands and brushing teeth. ‘Cos I just know that the kitchen sink is inevitably going to be full of dirty dishes most of the time.
Finding more space
OK, if you know anything about camper vans, you’ll quickly recognize that the above list is a lot. Especially in a medium length cargo van like our non-extended 159” wheelbase ProMaster.
The fact is, the majority of camper van conversions all use a rather similar layout. The back half of the cargo space is dominated by a bed, with storage and electrical and plumbing systems underneath. In front of that you have a galley kitchen on one wall, and a bathroom (if present) on the opposite wall. Finally, up front, you have passenger seating (if present) and some kind of table. Often swivels are installed on the cab seats so that they can rotate to face the back. There are lots of variations of course, but probably 95% of camper vans share most of these elements.
This is the Winnebago Revel Sport 44N, for example:
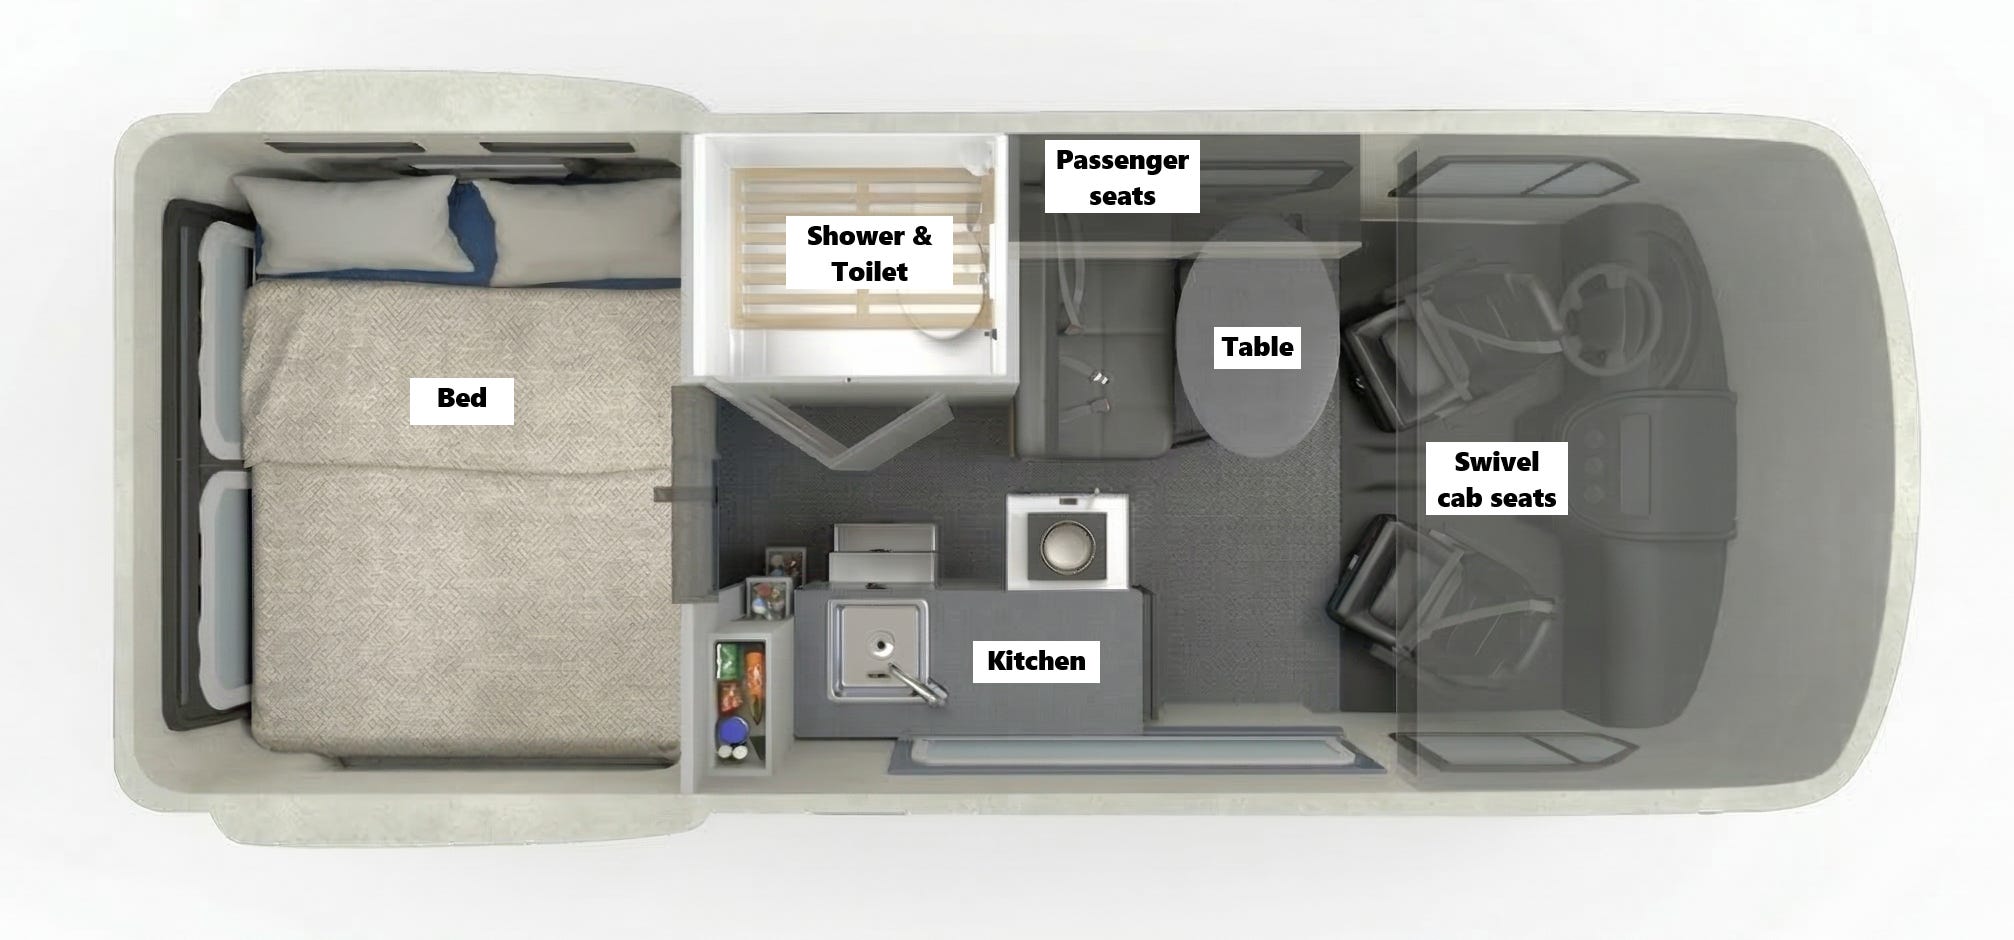
While this layout clearly works for many people, there are a few things we didn’t like about it for us:
There’s not a lot of storage, except under the bed, which can be awkward to access.
Counter space is pretty limited.
The table is too small, and is awkwardly positioned for the passenger side cab seat. And it can’t easily be made bigger without blocking the side door.
Squeezing in sleeping for the kids is challenging.
One big factor here is simply the enormous fraction of available square footage occupied by the bed. So, what if we got rid of the bed?
There are some pretty neat designs that feature beds that either fold up against the wall, or that raise the bed up against the ceiling using a powered lift mechanism, but we ultimately decided to go with a fairly old camper van solution: adding an upstairs sleeping area by fitting a “pop top” to the roof.
I’ll talk more about the pop top in the future post, but suffice to say that moving the bed upstairs frees up a lot of space downstairs. So the next task was to figure out how to best make use of that for everything else we wanted to fit in.
Concrete inspiration
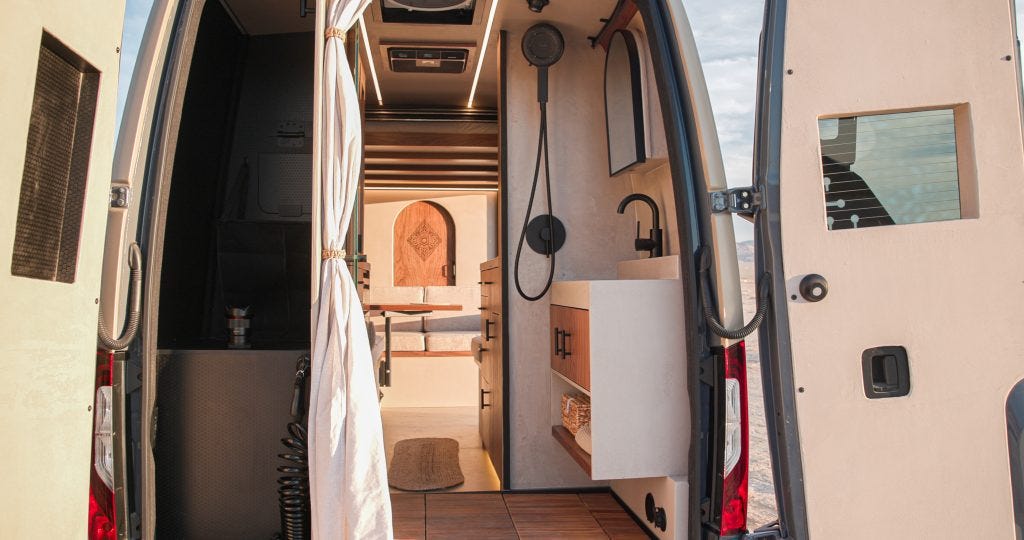
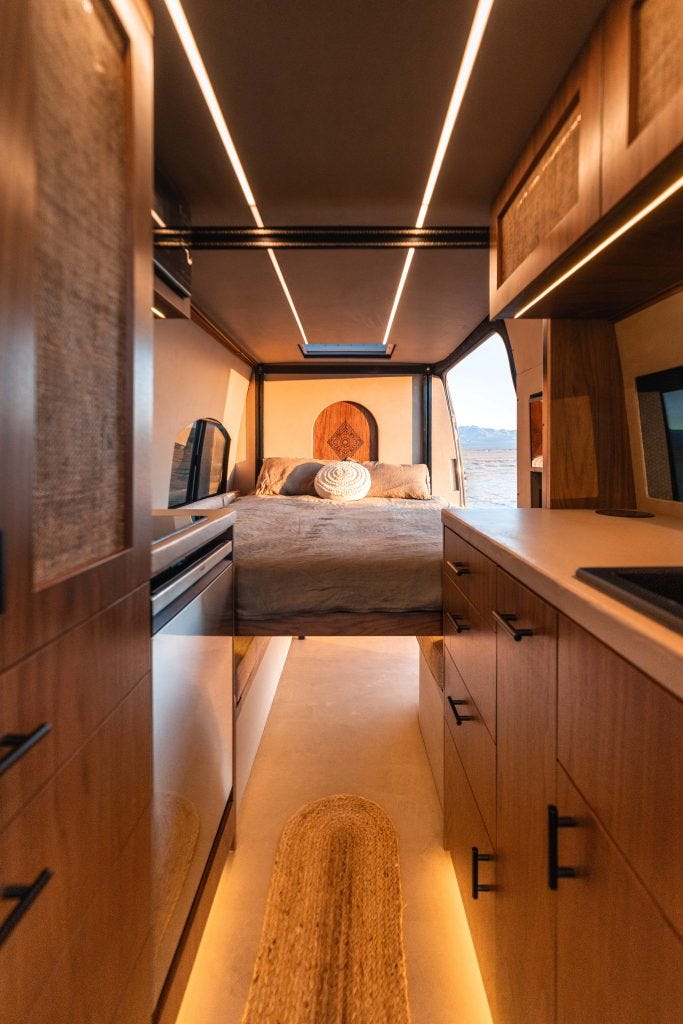
Around about the same time we were thinking about this, I stumbled across a YouTube video describing the bizarrely named, but wildly viral Concrete Oasis van. This is the kind of van that YouTube loves, full of beautiful finishing touches, and inhabited by beautiful people who seem to move in perpetual slow motion. But, looking past the glitz, it features a couple of really interesting layout ideas.
First, like us, the builders had decided to get rid of the bed in the back. In their design, the bed lives at the front, but stored out of the way, up against the ceiling most of the time using an electric bed lift. Our pop top achieves a similar goal of getting the bed out of the main space, but with different tradeoffs.
Second, the layout features a really nice and open lounge area at the front of the cargo area, with seating for about five people and a fairly decent table. The interesting bit here is that rather than trying to incorporate the cab seats into the living space, the cab is sealed off from the living space by a partition wall. At first glance this seems wasteful of space, but the upside is that it gives you a lot more flexibility to position seating and tables in a more user friendly fashion. In particular, the design incorporates a rear-facing bench seat that spans the width of the van.

Third, there’s a decent-sized bathroom at the back, featuring a composting toilet that slides away into the wall when not in use, a shower, and a sink. Even with all this, the bathroom only takes up about two-thirds of the width of the van, so there’s also room for a vertical “garage” space.
Finally, there’s an impressive amount of storage and counter space.
Sketching out the plan
The Concrete Oasis can keep its “desert inspired micro-concrete wall finishes”, and “handmade artisan wood-burnings” (cool though they are), but there are a bunch of other ideas here that are definitely worth stealing! So inspired, I fired up my CAD software (SketchUp), and sketched out the following:
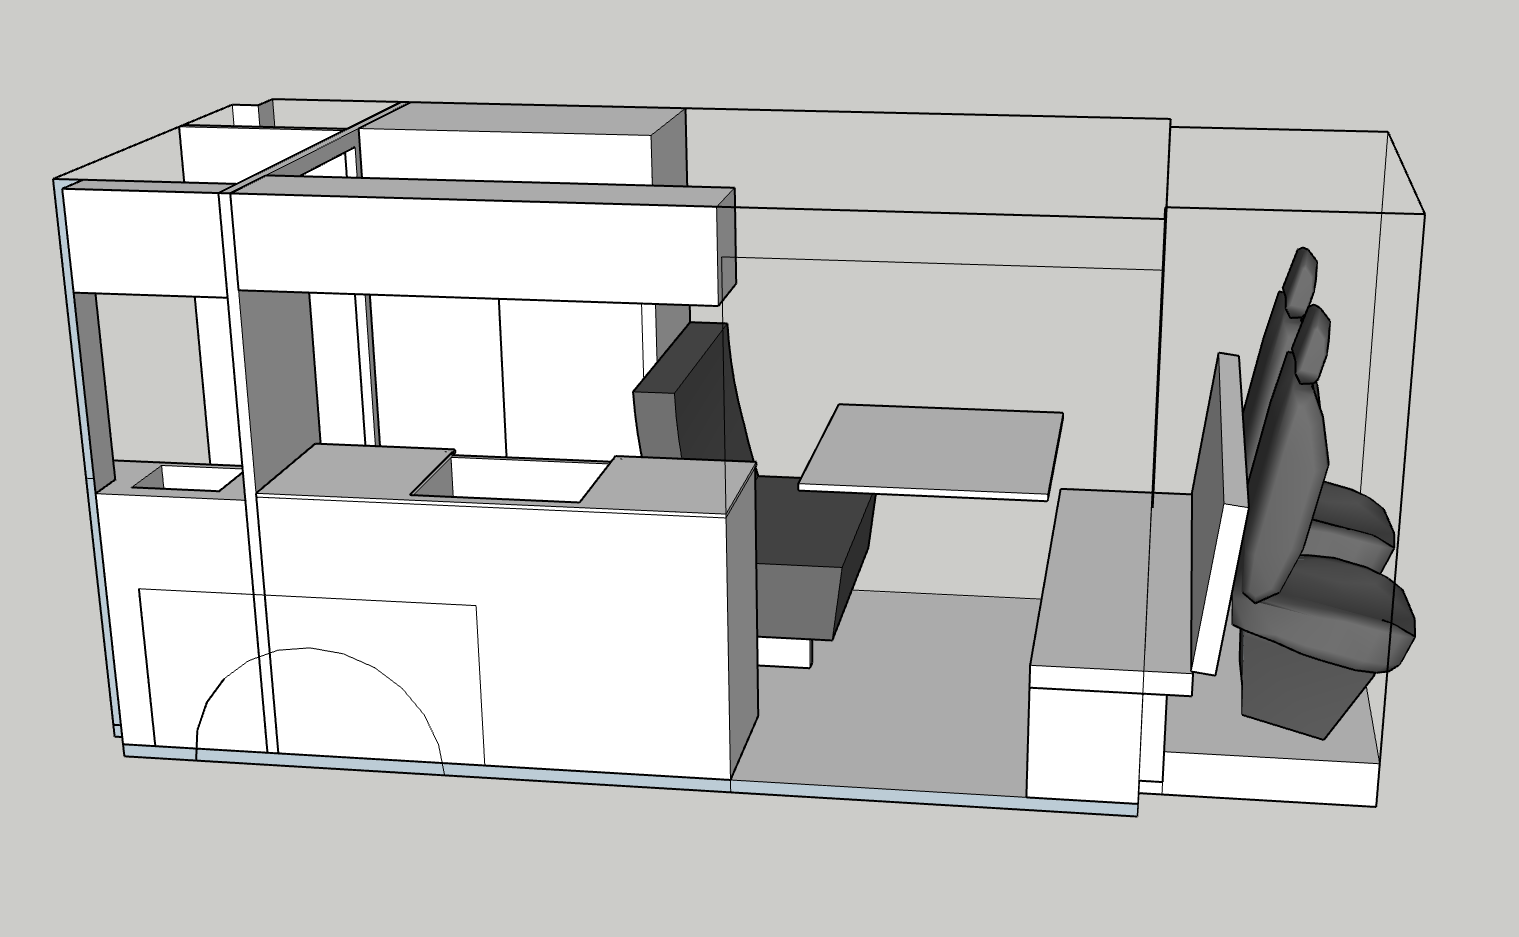
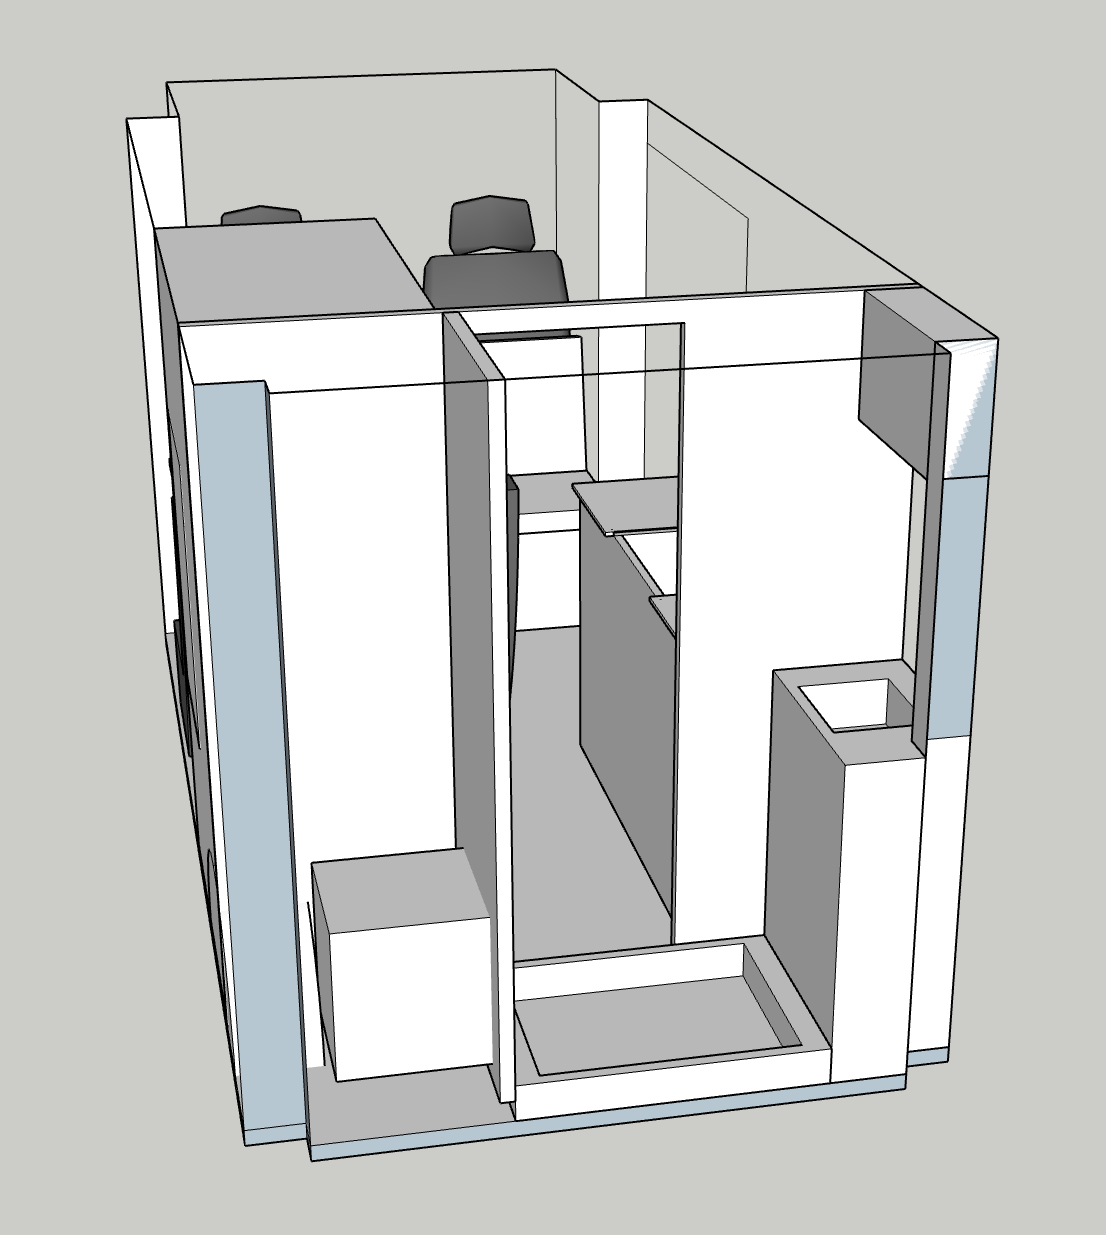
There are a few significant differences from the Concrete Oasis layout:
I kept the rear-facing bench seat from the Oasis layout, but instead of incorporating it into a “L” , I paired it with a forward-facing two person passenger seat, with a table in between. This is primarily for safety reasons, but also makes for a dining table that four people can use easily.
There’s no solid partition wall between the lounge area and the cab. This allows the rear-facing bench seat to slide into the cab area by about 6-8”, with the cab seats pushed all the way forward. This goes some way towards making up for the fact that the Oasis is built on a Sprinter 170” wheelbase platform, which is about 20” longer than our ProMaster.
There’s no need for a bed lift, since our main sleeping area is in the pop top.
There are many, many other details that I could talk about, but this has already been a very long post, so I’ll just finish by summarizing the main advantages of this layout.
Decent-sized table that four people can sit around.
Spacious (for a van) bathroom with hide-away toilet, a shower, and a separate sink.
Tons of storage space.
Great counter space - about 6’ long.
Roomy sleeping for two adults upstairs. Optional sleeping for two kids downstairs in the lounge area (details TBD!).
Time to get to work building it!
Nice post Simon!